How Do I Update My Menu?
Adding a clear, detailed, and comprehensive menu to your Roaming Hunger account is one of the most important factors in determining your success on our platform. We recommend spending time finalizing it before addressing any of the other steps on your profile completeness meter. This is because your menu is the first impression clients get of your business and your offerings, whether viewing your public profile for a vending event or in a package submitted for a catering event. It's a misunderstood feature, so let's set you up for success.
Building Your Menu, Step By Step
Roaming Hunger menus work like building blocks; each menu item is a block for building. This creates a standard layout and allows flexibility later when you create custom catering packages from them. This also means you may not upload your menu as an image, PDF or other format. All images are auto-cropped and will not allow you to appear on event proposals. Get started on your Dashboard's Menu page instead.

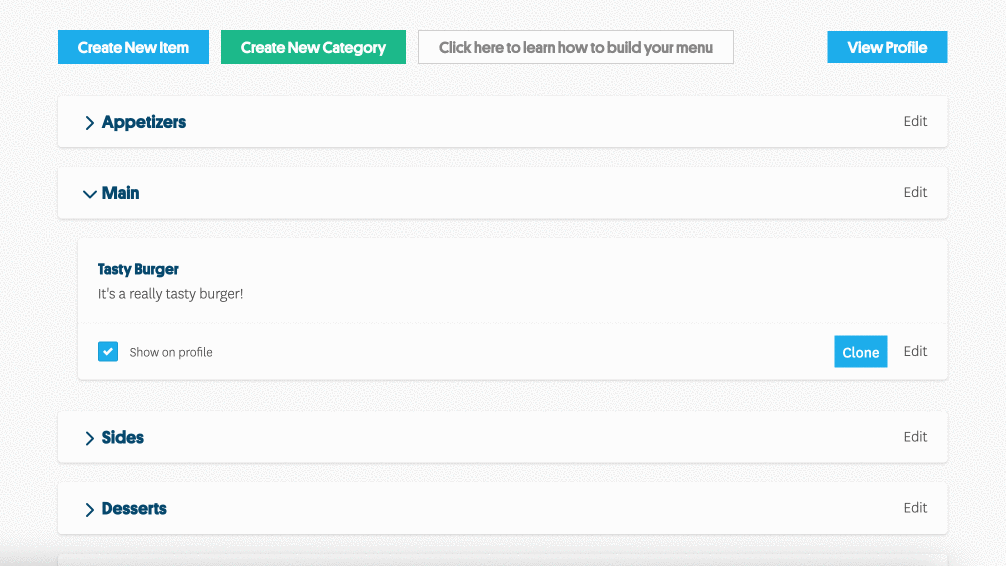
1. Organize Your Menu into Categories
Before creating new menu items, structure your menu by organizing it into categories, such as Main, Side, and Drink. These category names are not hard-coded. If you serve ice cream, for instance, you may tap Edit on those existing categories to delete or customize them. For example: Ice Cream Flavors.
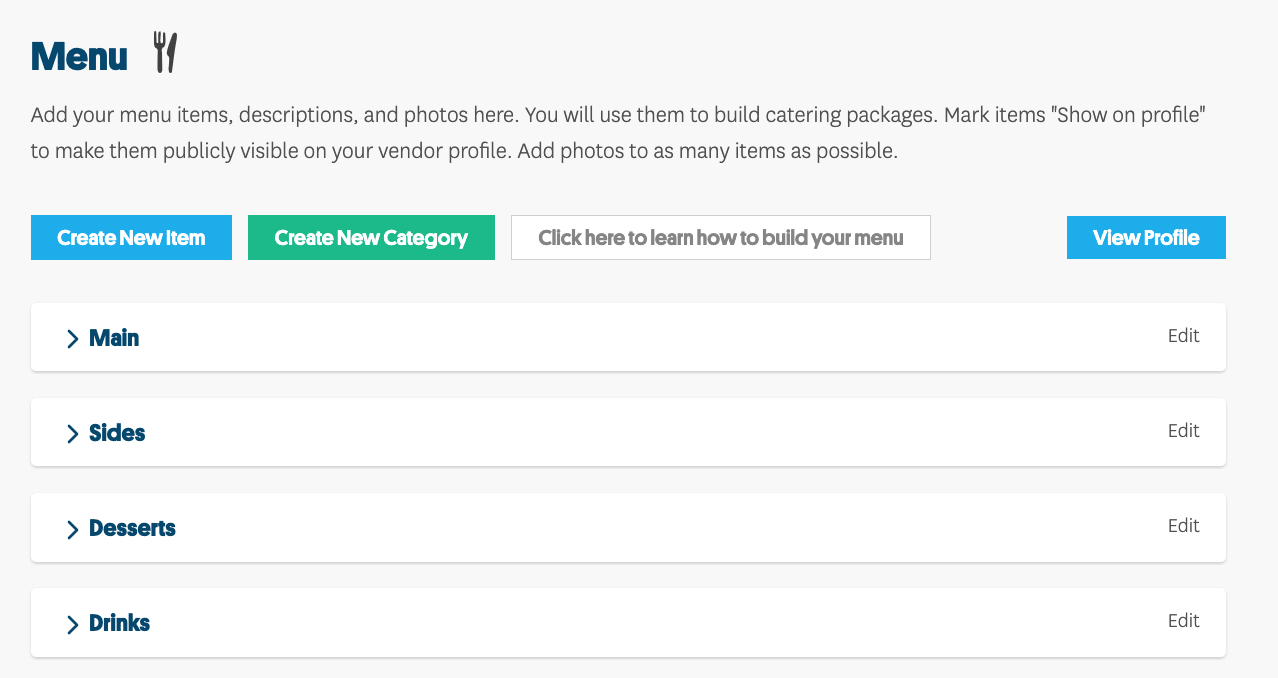
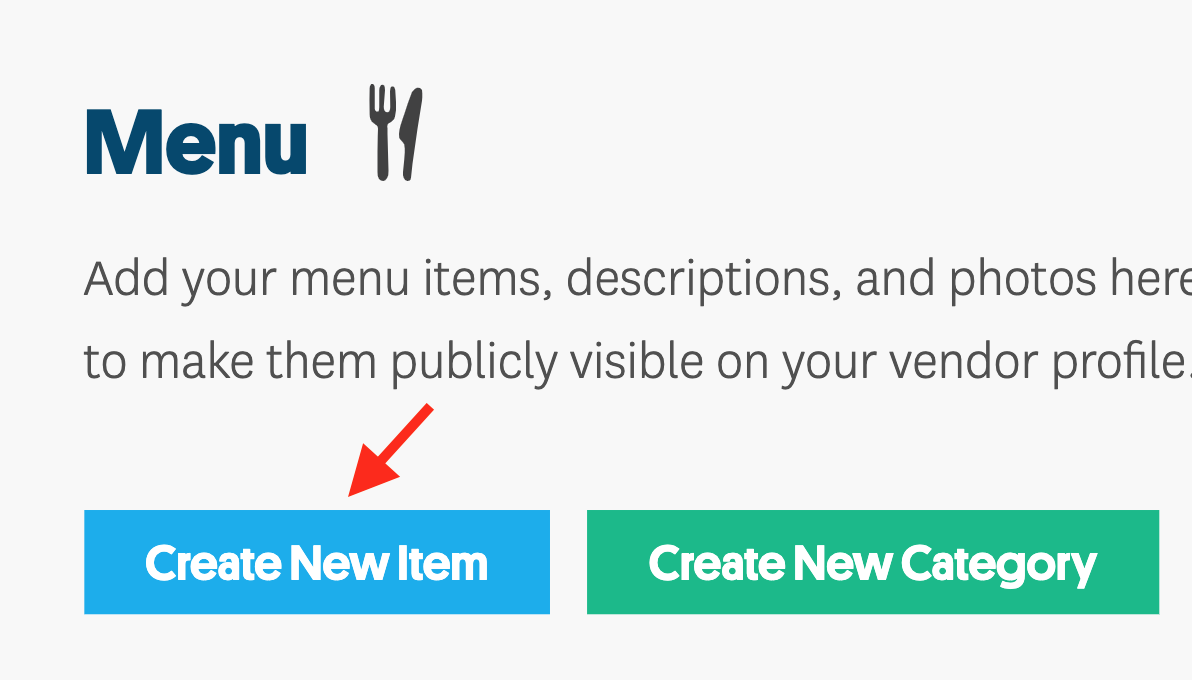
2. Add Menu Items
Once your menu is organized into categories, add menu items to those categories by selecting Create New Item.
Once your Create New Item window opens, fill in as many spaces as you can. See tips below this animation.
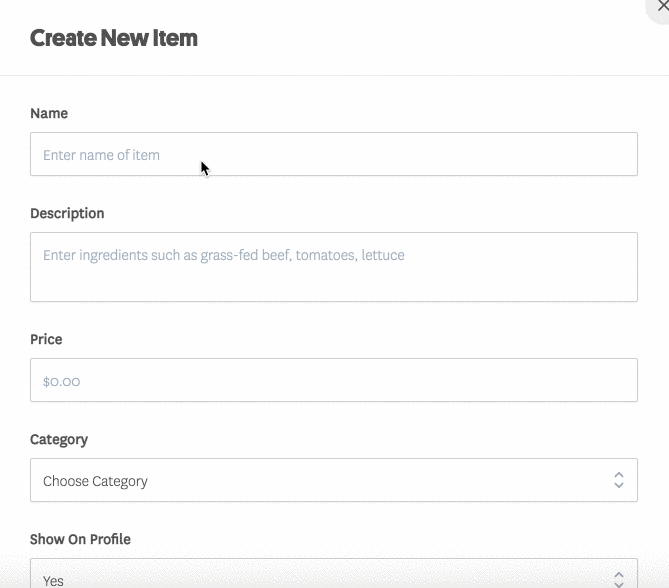
Tips for Each Field
- Name: What are you selling? Is it a “Burger” or a “100% Angus Beef Burger?” Is it a “Taco” or an “Asada Street Taco?”
- Description: Show off your ingredients. You might even mention signature or secret sauces. Don’t worry, we won’t give away your secrets. A strong description will make your menu item more appetizing and competitive.
- Price: This field is an outdated feature and does not need to be completed. You will price your packages instead once you have finished your menu.
- Category: Assign this menu item to one of the categories you just created.
- Show on Profile: Toggle this if you want an item to display publicly or remain private for special or seasonal events.
- Modifiers: Modifiers let people know how they can customize their order (e.g. toppings, sauce, etc.). See below for an illustration of how these look:
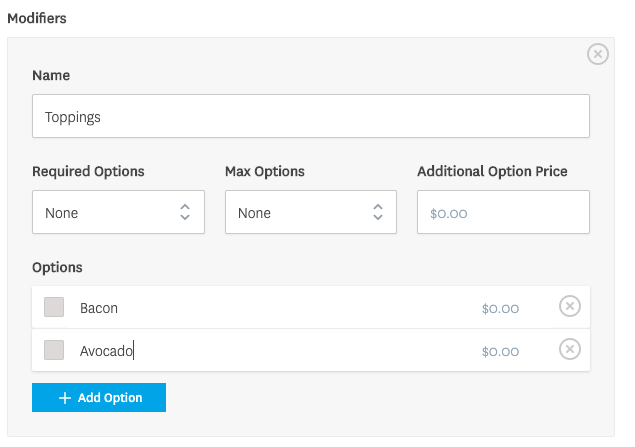
Modifier Tips
- Modifier Name: What type of option is this? Toppings? Pick Your Protein? Vegetarian Option?
- Required Options: Do they have to add anything to complete their order? (e.g. What type of patty? What filling?)
- Max Options: If only X options can be added to an order, specify here.
- Additional Option Price: What would it cost to add one more than the max?
- Options: List all options, one by one, with any added cost.
If you have multiple modifiers, like a custom burger with custom toppings and custom sauces, select Add Modifier to grow your list. Don't forget to Save when you're done!
3. Making Changes
Clone Menu Items
Do many of your menu items have the same modifiers? (e.g. protein choice, toppings, milk type) Save time by tapping the blue Clone button on an existing menu item to carry over all established settings.
Reorder Menu Items
To reorder your menu items, just drag and drop them within a category. At this time, it is not possible to drag and drop between Categories. To move a menu item to a different category, click Edit, change the category on the Menu Item popup window, then Save.

Delete a Menu Item
To delete a menu item, simply click Edit to open, scroll to the bottom, and select Delete.

4. Preview Your Menu
NOTE: Due to caching, it may take up to 24 hours for your menu updates to post on your profile. To preview your changes in real time, scroll up to the top of your Caterer Profile page and select View Profile.

| Once your menu is complete, CLICK HERE to move on to the next step:
Catering Packages |